It’s tough out there I tell you. We live in a world where consumers, readers, human beings are super fussy! WE are super fussy. If we land on a webpage that is in a terrible font, uses amateur banners or no visuals to explain a point, we’re out of there quicker than you can say ‘carpal tunnel’.
So as an online writer, what are you going to do about it? You’re gonna learn how to make every one of your posts awesome by using basic HTML code. Yes, HTML. You don’t have to be one of those soft spoken introverts who use words like ‘interwebz’ and ‘cache’ to use HTML. All you have to do is copy the HTML code of the outcome you want to achieve and insert the words you want it to apply to, in between the code.
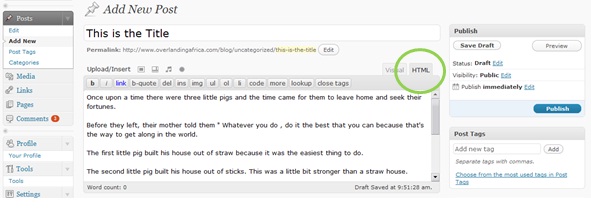
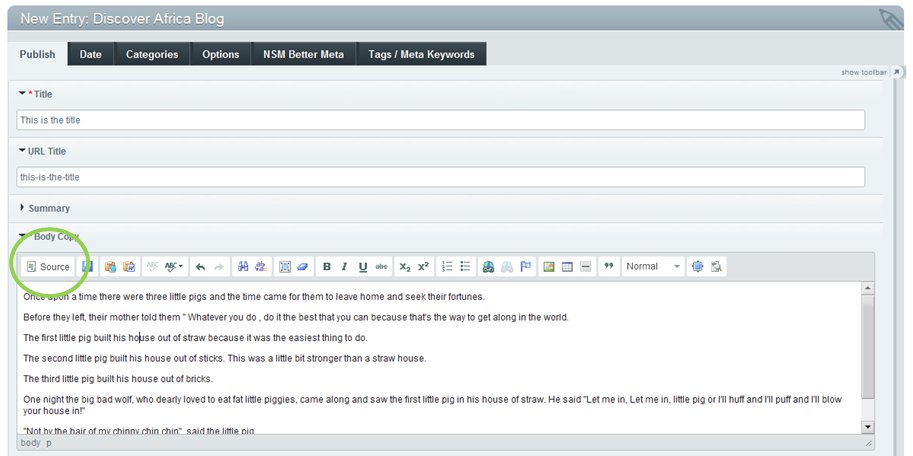
So first thing is first. Once you’ve uploaded all the text into your blog, you need to click on the ‘Source’ or ‘HTML’ button of your post. This is where you will be inserting the HTML code in order to get the final result you’re looking for. Below are 5 basic HTML tips for beginner bloggers.
WordPress ‘HTML’ Tab:
Expression Engine ‘Source’ Button:
1. Headings :
The HTML code for creating headings is called ‘h-tags’. Headings are great to indicate structure to a piece of writing. These offer the opportunity of upgrading text to larger, bolder text, which tells the search engines (e.g. Google) that this heading is important and is related to your article. This boosts the credibility of your article and allows the search engines to favour your article when ranking it. So that’s why a normal bold button and size select isn’t as effective as using h-tags. The difference between an h1, h2 and h3 tag, is the size as you can see below:
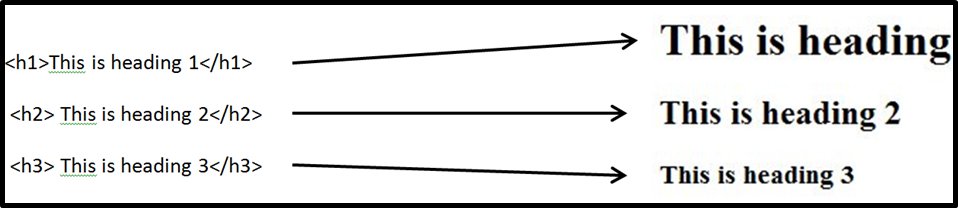
CODE FOR CREATING YOUR OWN H2 HEADING:
<h2>Insert your text here</h2>
Your formatting toolbar usually inserts the HTML code for you. For example, when you click on the ‘Heading 2’ button, your computer inserts HTML code that lets your computer know that the text should be a specific size and font. But some your formatting toolbar doesn’t have a ‘Heading 2’ button. Hence the need for the HTML h-tags.
2. Paragraphs :
Sometimes your CMS (WordPress, Expression Engine, Yola, Blogspot etc), does really weird things and throws your spacing way out or doesn’t want to let you insert enter keys. Paragraph HTML to the rescue! This ‘<p>’ opens the tag and ‘</p>’ closes the tag. Check it out below:

CODE FOR CREATING YOUR OWN PARAGRAPH:
<p>Insert your entire paragraph of text here.</p>
3. Formatting :
So your WYSIWYG toolbar (that formatting panel with the bold, italics and underline buttons) doesn’t have the button on it that you need. Doh! But with HTML code, all you have to do is click on that ‘Source’ or ‘HTML’ button/tab and stick in the right code and voila. You’ve managed to render that WYSIWYG strip useless. Good job! Check out the examples of the HTML code with its text on the left and the resultant front-end view on the right.

4. Converting a ‘follow’ link to a ‘no-follow’ Link :
A ‘no-follow’ link looks exactly the same as a normal ‘follow’ link. It directs a user to another webpage just as a ‘follow’ link does. The only difference between a ‘follow’ link and a ‘no-follow’ link is that a ‘no-follow’ link allows your website to hold onto its SEO (search engine optimisation) juices. So if you’re linking to a website that is ranked lower than yours, your website doesn’t suffer from being associated with its low rank. It’s not personal; It’s just business.
Here’s how you insert a ‘no-follow’ link:
1. Click on the ‘Source’ or ‘HTML’ button/tab.
2. Find the link you wish to convert.
2. Insert: rel=”nofollow” into the existing ‘follow’ HTML link code.
The ‘follow’ link:
<a href=”http://www.overlandingafrica.com/“>Overlanding Africa</a>
The ‘no-follow’ link:
<a rel=”nofollow” href=”http://www.overlandingafrica.com/ “> Overlanding Africa </a>
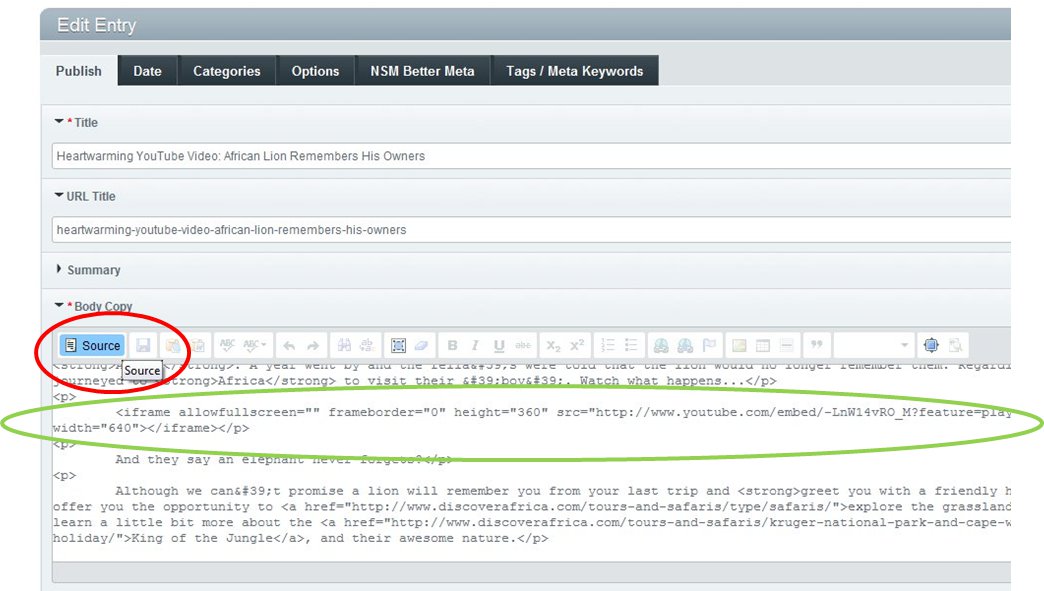
5. Inserting a YouTube Video into Your Blog :
When words fail to capture the attention or point of a topic, we turn to visual aids. YouTube videos are awesome. What is even more awesome is being able to insert a YouTube video directly into your post. This means that a reader doesn’t have to navigate away from your article in order to watch a YouTube video. Here’s how you do it:
1. Right click on the video in YouTube you wish to use, while it is playing.
2. Select ‘Copy embed html’.
3. In the CMS field where you want to insert the video, click on the ‘Source’ or ‘HTML’ button/tab and paste the embed code here.
4. Click on the ‘Source’ or ‘HTML’ button/tab again to preview the correct placement.
5. Save.
So there you have it. A basic guide to using HTML in your blogs! Once you’ve grasped the concept of how HTML works, you’re on your way to becoming a pro-HTML-blogger! Now go grab some cache and go buy yourself a cookie.